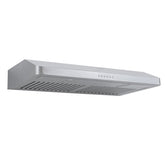
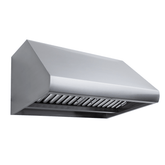
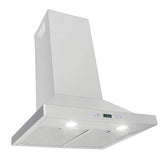
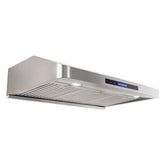
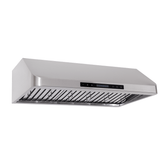
After you tighten the screws and install your new range hood, it’s difficult to go back and make adjustments. So, it’s important that you properly level your range hood the first time you install it.
Create a template by tracing the mounting bracket on a piece of cardboard the width of your range hood. Also, outline the mounting holes. Use this piece of cardboard to mark the mounting holes on your wall. After you mount the hood – and before you tighten the screws completely – use a level to test the front-to-back and horizontal alignment. Once your hood is level, tighten the screws.
Keep reading as we outline seven easy steps to take accurate measurements and install the hood. By the end, you’ll know how to level a Proline range hood like a pro.
As you read the steps, refer to the video below where we install one of our under cabinet range hoods.
1. Attach the mounting bracket to the range hood.
The range hood installed in this video has six screw holes in the back of the hood. This is where you attach the mounting bracket using the provided machine screws.
2. Cut out a rectangular piece of cardboard the width of your range hood.
Next, we’ll make a template that makes lining up your hood easy. You just need a rectangular piece of cardboard that is at least the width of your range hood. To make things easier, make sure it has a flat bottom edge. This represents the bottom of your range hood.
3. Align it with the back of the hood. Trace the mounting bracket and screw holes on the front.
Now that you installed the mounting bracket, trace it on the cardboard cutout. Trace the outside as well as the eyelets with a pen or pencil.

4. Make markings on your wall to help mount your range hood.
Next up, you need to make a few more markings – this time on your wall – to guide you through the installation.
Use a level and tape measure for accurate measurements and markings.
Here’s what you need to mark.
Bottom of the Hood
You might be wondering: how do I know where to mark the bottom of my range hood? For best results, mount your indoor hood between 30 and 36 inches from the cooktop.
This means that the bottom of your hood should be between 30 and 36 inches from your range.
Use a tape measure to measure 30-36 inches from your range and make a mark. This is where you line up the bottom edge of the cardboard.
For more helpful information on mounting your range hood, check out our range hood mounting height guide.
The Center of Your Wall
The last step is to line up your template with the center of your hood.
The first thing to determine is the width of your cabinets. Let’s say they are 36” inches. Then you will make a vertical mark on your wall at 18”.
Reminder: Use a level for accurate, straight markings.
5. Align the cardboard template to the markings on your wall.
Now, on the cardboard, mark the center of your mounting bracket.
Align the bottom edge with the bottom marking you made in step 4.
Align the center of your mounting bracket with the center marking you made in step 4.
6. Use a pencil or pen to poke a hole through the top of the eyelets.
With the bottom edge of the cardboard lined up, poke a hole through the cardboard in the top of the eyelets.
Be sure to poke all the way through the cardboard so you can tell where to drill your holes later.
7. Drill your self-tapping screws into the wall.

Following the markings you made in step six, drill the self-tapping screws into the wall.
Self-tapping screws anchor themselves into the sheetrock as you drill them into the wall.
8. Drill grabber screws into the anchors. They should stick out about ¼”.
You will hang your range hood on these grabber screws. This is why they need to stick out about a quarter inch.
9. Locate a stud and make a pencil marking on the wall.
Use a stud finder to locate a stud. When you mount your range hood, you can drill a screw through your hood into the stud for extra support.
If you don’t have a stud finder, check out this quick video.
Once you’ve found your stud, make a pencil marking at the bottom of your hood. Be sure to make the marking near the bottom of your hood. After you mount the hood, you won’t be able to see pencil markings.
10. Hang the range hood.
Grab a friend to help you mount your range hood. Most 30 and 36” wall and under cabinet hoods weigh about 50 pounds. Larger hoods can be quite heavy.
Now you’re ready to test if your range hood is level.
After the Range Hood Installation

Check the horizontal level.
Set a level under the front of the hood and make sure the bubble is centered.
Check the front to back level.
Now, shift your level to test the front-to-back alignment. If it’s not centered, you might need to insert shims. Shims are small wooden pieces that help keep your hood level. They sit between the back of the hood and the wall.
If your hood is not level…
Your mounting screws may be crooked.
Reverse the direction of your drill and unscrew the grabber screws. They may have drilled into the wall crooked. Rescrew them carefully and make sure that they are straight.
Your mounting screws may not line up.
If you used a template, it’s unlikely that your mounting screws do not line up. If not, you may have to remove the self-tapping screw, patch the hole, and redrill. But, we used a template and measured carefully so you don’t have to go through that hassle. It’s best to get the alignment right the first time.
If everything is level, tighten the grabber screws on the mounting bracket.
Once you’ve confirmed that your range hood is level horizontally and front-to-back, tighten the grabber screws. Now you’re done! Your range hood is level!
Hopefully you enjoyed this guide on how to level a Proline range hood. To complete the installation, refer to the above video.
Or, we have several articles that show you exactly how to install a range hood, which you can browse below.
