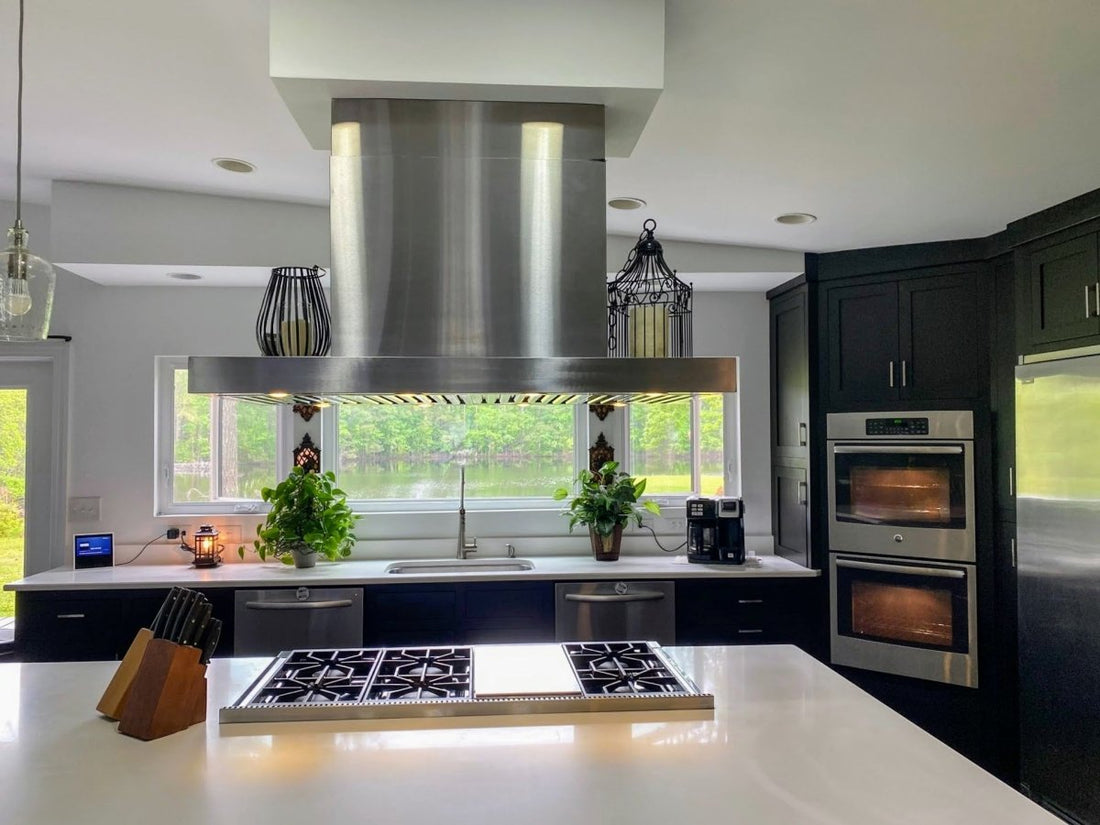
When it comes to kitchen ventilation, island range hoods operate on familiar principles but face unique challenges that demand special consideration. Understanding these differences is crucial for achieving optimal ventilation in your kitchen space.
Understanding Basic Range Hood Dynamics
At their core, all range hoods - whether mounted on a wall, under a cabinet, or over an island - create a low-pressure zone above your cooking surface. This zone captures cooking byproducts like smoke, steam, grease, and odors, protecting your kitchen's air quality and surfaces. This fundamental principle remains constant across all hood types.
Key Principle:
All range hoods work by creating a low-pressure capture zone above your cooking surface, but island hoods face unique environmental challenges that require special solutions.
The Island Hood Challenge: Operating in Open Space
The most significant challenge for island hoods lies in their unique positioning. Unlike wall-mounted or under-cabinet hoods that benefit from surrounding structures, island hoods operate in a completely open environment. This 360-degree exposure creates several critical challenges that require specific solutions.
Why Traditional Ventilation Methods Fall Short
In standard wall-mounted installations, the wall itself helps direct airflow and contain cooking byproducts. Island hoods lack this advantage, making them more vulnerable to:
Cross-Drafts
Kitchen traffic and movement create air disturbances that can disrupt capture zones
HVAC Interference
Air conditioning and heating systems can interfere with hood airflow patterns
Plume Spillage
Cooking byproducts can escape from all four sides without wall containment
Environmental Factors
Nearby windows, doors, and open floor plans create additional airflow challenges
Higher Power Requirements for Effective Capture
Due to these environmental challenges, island hoods typically require more powerful ventilation than their wall-mounted counterparts.
| Hood Type | CFM per 10,000 BTU | Example: 60,000 BTU Cooktop |
|---|---|---|
| Wall-Mounted Hood | 100 CFM | 600 CFM minimum |
| Island Hood | 150 CFM | 900 CFM minimum |
| Recommended Island | 150+ CFM | 1,100 CFM optimal |
Power Calculation Example:
A 60,000 BTU gas cooktop that might work well under an 800 CFM wall-mounted hood would perform better with an 1,100 CFM island hood for optimal capture and ventilation.
Critical Design Considerations for Island Hoods
The open-air environment of island hoods demands careful attention to design elements that might seem less critical in traditional installations.
Size and Coverage Requirements
Indoor Kitchens
Minimum extension beyond each side of cooking surface
Outdoor Installations
Required overlap on all sides for environmental factors
Mounting Height Guidelines
| Installation Type | Height Range | Optimal Height | Reason |
|---|---|---|---|
| Indoor Islands | 28-36 inches | 32 inches | Balance of capture and accessibility |
| Outdoor Islands | 36-42 inches | 38 inches | Higher heat output from grills |
Essential Steps for Optimal Performance
Creating an effective island hood installation involves a carefully orchestrated combination of factors working together.
Step 1: Proper Sizing and Power Calculations
Calculation Process:
- Evaluate your cooking equipment's BTU output or width
- Calculate baseline CFM requirements (150 CFM per 10,000 BTU)
- Add 30-40% additional capacity for island challenges
- Consider environmental factors (windows, doors, traffic patterns)
Step 2: Ductwork Requirements
Your hood's CFM rating directly dictates the minimum duct size needed. Proper duct sizing ensures your hood can move air efficiently without creating unnecessary noise or strain on the system.
| CFM Range | Minimum Duct Size | Recommended Size |
|---|---|---|
| 600-900 CFM | 6 inches | 8 inches |
| 900-1200 CFM | 8 inches | 10 inches |
| 1200+ CFM | 10 inches | 12 inches |
Step 3: Maintenance Requirements
Regular Maintenance Schedule:
- Clean stainless steel baffle filters every 2-4 weeks (dishwasher-safe)
- Replace charcoal filters every 3-6 months for ductless systems
- Inspect ductwork annually for optimal performance
- Check dampers and exterior vents seasonally
Maximizing Island Hood Effectiveness
Best Practices for Optimal Performance:
- Size and power your island hood properly when you buy it
- Start ventilation before cooking to establish proper airflow patterns
- Use appropriate fan speeds based on cooking intensity
- Keep windows closed during high-heat cooking
- Position the hood to minimize cross-draft interference
- Consider surrounding kitchen layout during planning
Success Formula:
The key to effective island hood ventilation lies in proper sizing, adequate power, and appropriate installation combined with regular maintenance. Understanding these crucial differences ensures optimal performance despite open-air challenges.
Frequently Asked Questions
Island hoods typically require 30-50% more CFM than wall-mounted hoods. While wall-mounted hoods need about 100 CFM per 10,000 BTU, island hoods should have 150 CFM per 10,000 BTU minimum for effective capture in open-air environments.
For indoor kitchens, mount island hoods 28-36 inches above the cooking surface, with 32 inches being optimal. Outdoor installations need 36-42 inches clearance due to higher heat output from grills and environmental factors.
Indoor island hoods should extend at least 3 inches beyond each side of the cooking surface. Outdoor installations require 6 inches of overlap on all sides to effectively capture cooking byproducts and combat environmental challenges.
Duct size depends on CFM: 600-900 CFM needs minimum 6" (recommend 8"), 900-1200 CFM needs minimum 8" (recommend 10"), and 1200+ CFM systems need minimum 10" (recommend 12") for optimal airflow and reduced noise.
Island hoods operate in open 360-degree environments without wall support to contain airflow. They're vulnerable to cross-drafts, HVAC interference, kitchen traffic, and plume spillage from all sides, requiring more power and careful positioning for effective ventilation.
Clean stainless steel baffle filters every 2-4 weeks depending on cooking frequency. They're typically dishwasher-safe for easy maintenance. For ductless systems, replace charcoal filters every 3-6 months to maintain optimal odor control.
Transform Your Kitchen with a Premium Island Range Hood
Ready to upgrade your kitchen island with professional-grade ventilation? Our experts can help you choose the perfect island hood for optimal performance.
Call (877) 901-5530 Shop Island Range Hoods


