


How to Install Your Outdoor Grill Vent Hood (With Photos)

Complete installation guide for wall-mounted and under-cabinet models
Installing a powerful outdoor range hood, especially a large 72" model, is a significant project that requires careful planning and execution. Fortunately, our EZ mounting bracket system makes the installation process much more manageable, even for DIY enthusiasts.
Table of Contents
What's Included in Your Package
Your outdoor range hood comes with everything you need for installation:
- Ducting transition pieces - For connecting to your ventilation system
- Complete hardware kit - All screws, bolts, and mounting components
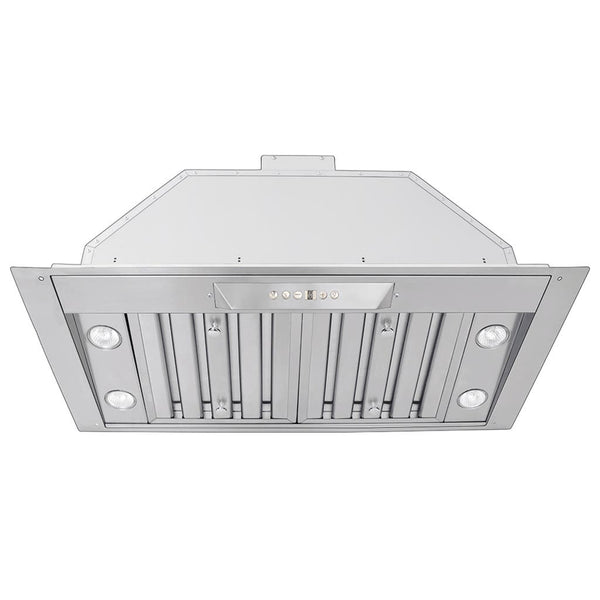
- Baffle filters
- Grease trays
- EZ hang mounting bracket - Our innovative installation system
Key Features of Your Outdoor Range Hood
- Dimmable Sealed LED lights - Weather-resistant illumination with adjustable brightness
- Heavy-duty rotary knobs - Built to withstand outdoor conditions
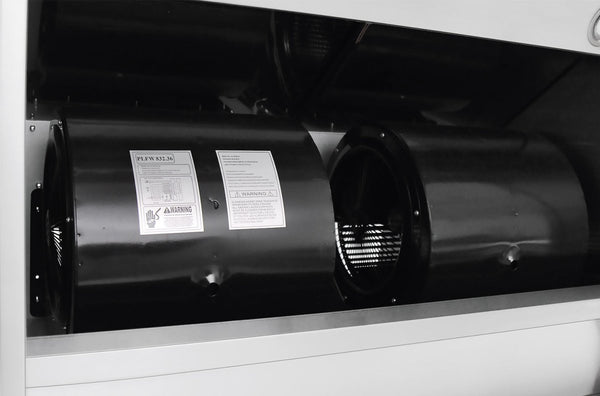
- Powerful 2000 CFM capacity - Four-speed blower system for maximum ventilation
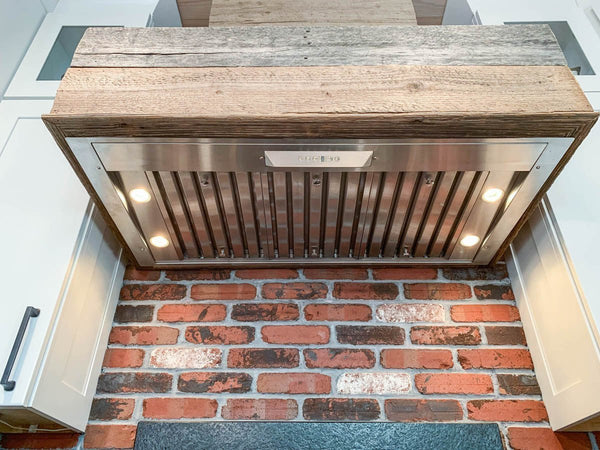
- Premium 304 stainless steel construction - 1.2mm thickness for ultimate durability
- Professional baffle filters - Dishwasher-safe and highly effective
This outdoor grill hood is also one of the best selling models, making it a popular choice among customers.

Tools You'll Need
Before starting your installation, gather these essential tools:
Level - For ensuring proper alignment
Screwdriver set - Both Phillips and flathead
Pencil or permanent marker - For marking mounting points
Utility knife - For opening packaging and trimming
Tape measure - For accurate measurements
Stud finder - To locate wall studs for secure mounting
Drill with bits - For pilot holes and mounting screws
Safety glasses and gloves - For protection during installation
Pre-Installation Planning
Height Requirements
Position your range hood 36" to 42" above your grill surface. This height provides optimal smoke capture while allowing comfortable cooking space.
Ducting Considerations
- Plan your ducting route before installation
- Ensure you have proper outdoor venting capability
- For dual blower systems, each blower requires separate ducting
Safety First
- Turn off power to the installation area
- Have a helper available - these units are heavy and require two people
- Check local building codes for any permit requirements
Step-by-Step Installation Guide

Measuring and marking the exact installation location for your outdoor range hood
Step 1: Mark Your Installation Location
Carefully measure and mark the exact position where your range hood will be installed. Use a level to ensure your marks are perfectly horizontal.

Installing the EZ mounting bracket to the back of your range hood

Range hood with EZ mounting bracket properly attached
Step 2: Install the EZ Mount Bracket
Attach the EZ mounting bracket to the back of your range hood using the provided hardware. The bracket is designed with multiple mounting points for maximum flexibility.

Mounting the wall bracket securely to wall studs using proper hardware
Step 3: Mount the Wall Bracket
Secure the corresponding bracket to your wall. The bracket features numerous holes to accommodate different stud spacing - use a stud finder to locate at least two studs for a secure mount.

Two people carefully lifting the range hood into position - teamwork is essential

Aligning the range hood with the wall bracket for secure mounting
Step 4: Hang Your Range Hood
With your helper, carefully lift the range hood and align the brackets until they interlock securely. The EZ mounting system allows for easy positioning and adjustment.
Step 5: Connect Ducting
Route your ducting according to your planned path. Remember that dual blower systems require separate ducting for each blower unit.
Step 6: Final Connections
Complete electrical connections according to local codes and test all functions including lights, fan speeds, and any additional features.

Post-Installation Tips
- Test all functions before considering the job complete
- Clean the installation area and dispose of packaging materials properly
- Register your product for warranty coverage
- Schedule regular maintenance to keep your hood performing optimally
Maintenance Recommendations
- Clean baffle filters monthly or as needed
- Empty grease trays regularly
- Wipe down stainless steel surfaces with appropriate cleaners
- Check ducting connections annually
Troubleshooting Common Issues
Hood not level? Adjust the EZ mounting bracket - it's designed for fine-tuning alignment.
Vibration during operation? Ensure all mounting screws are properly tightened and check that ducting is properly secured.
Reduced airflow? Check and clean filters, and inspect ducting for obstructions.
Conclusion
Your new outdoor grill range hood is an excellent addition to any outdoor kitchen space. It keeps your cooking area clean, smoke-free, and visually appealing while tying together your entire outdoor kitchen design. The powerful ventilation system ensures a comfortable cooking environment for you and your guests.
Check if your preferred outdoor grill hood is in stock and place your order today to ensure prompt delivery. Secure your new outdoor kitchen upgrade and start enjoying your enhanced cooking experience as soon as possible.
Need Additional Help?
 If you have questions about installation or need technical support, contact our US-based customer service team. Our knowledgeable staff is ready to help you complete your installation successfully and ensure you get the most from your new outdoor range hood.
Remember: When in doubt, consult a professional. Proper installation ensures optimal performance and safety for years to come.
