A properly functioning kitchen vent hood is essential for maintaining air quality and preventing grease buildup in your kitchen. When problems arise, many homeowners assume they need to call a professional immediately or replace the entire unit.
However, with some basic knowledge and the right approach, you can diagnose and often repair common vent hood issues yourself, saving both time and money.
Diagnosing Your Vent Hood Issues
Before attempting any repairs, it's crucial to accurately diagnose the problem. Here are common issues that affect kitchen vent hoods and their typical symptoms:
Power-Related Issues
Power Surges and Circuit Board Damage
- Symptoms: Hood doesn't respond at all, lights flicker, inconsistent fan operation
- Cause: Electrical surges can damage the sensitive electronics in modern vent hoods
- Diagnosis: If the hood stopped working after a storm or power outage, the circuit board may be damaged
Faulty Touch Panel
- Symptoms: Some buttons work while others don't, panel requires multiple presses to respond
- Cause: Normal wear and tear over time, especially in areas exposed to cooking moisture and grease
- Diagnosis: Test each button's functionality; inconsistent response indicates panel issues
Circuit Board Failure
- Symptoms: The range hood will malfunction and not work properly
- Cause: Age-related deterioration, moisture damage, or electrical issues
- Diagnosis: If the hood doesn’t function erratically even, suspect the circuit board
Mechanical Issues
Improper Ducting Installation
- Symptoms: Poor ventilation, excessive noise, moisture buildup
- Cause: Ducting that's too long, has too many bends, or is improperly sealed
- Diagnosis: Inspect visible ductwork for obvious issues; excessive condensation inside the hood may indicate airflow problems or the roof cap could be the wrong type, or too many dampers in the application.
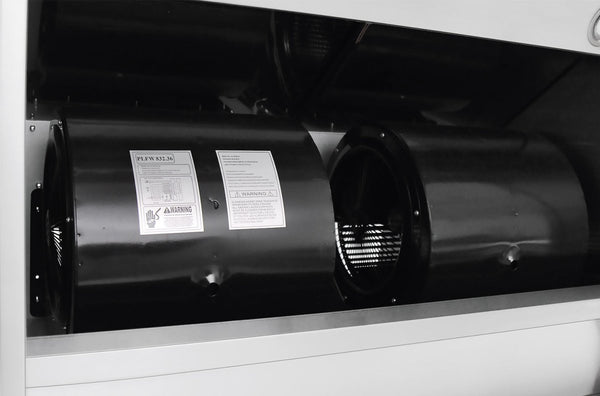
Blower Problems
- Symptoms: Unusual noises, reduced airflow, vibration
- Cause: Grease buildup, bearing wear, motor failure
- Diagnosis: Run the fan at different speeds and listen for grinding, scraping, or buzzing sounds
Ordering the Right Parts

Once you've diagnosed the issue, you'll need to source the appropriate replacement parts:
Finding Your Model Information
- Look for a label inside the hood (often visible when filters are removed)
- Record the brand, model number, and serial number
- Take photos of any existing parts you need to replace
Where to Order Parts
Common Replacement Parts
- Control panels/touch panels
- Circuit boards
- Blower motors
- Light assemblies
- Filters (replace regularly)
Cost Considerations
- Touch panels: $59.95
- Circuit boards: $149.95
- Blower motors: $179.95
Easy DIY Repairs
Safety First
- Always disconnect power before beginning any repair
- Work with a partner when removing heavy components
- Keep track of all screws and parts during disassembly
Cleaning and Maintenance
- Clean filters in hot, soapy water every 1–3 months
- Remove and clean blower wheels annually
- Clean ductwork as needed to ensure airflow
Replacing the Touch Panel
- Disconnect power at the breaker
- Remove trim pieces around the control area
- Disconnect ribbon cable connecting panel to circuit board
- Install new panel and reconnect the cable
- Test before reassembling
Replacing the Circuit Board
- Disconnect power
- Access main compartment (usually behind filter)
- Take photos of wire connections before disconnecting
- Remove mounting screws and old circuit board
- Install new board and reconnect wires
- Test functionality
Blower Motor Replacement
- Disconnect power
- Remove filters to access blower assembly
- Disconnect electrical connections (take photos)
- Remove mounting screws and extract blower
- Install new blower and reassemble
- Test operation at all speeds
When to Get Professional Help
Complex Electrical Issues
- Problems persist after replacing components
- Potential wiring issues inside walls
- Frequent breaker trips when hood is used
Structural Concerns
- Ducting reroutes or replacements
- Complete hood removal or repositioning
- Water damage or mold around hood
Manufacturer-Specific Complexities
Modifying the hood beyond original specs may void the warranty.
Cost-Benefit Analysis
- If repair cost exceeds 50% of replacement cost, consider a new unit
- Factor in hood age and energy efficiency gains with new models
- Evaluate your time, tools, and frustration level before deciding
Conclusion
With proper diagnosis and the right approach, many kitchen vent hood problems can be resolved without professional help. Regular maintenance—particularly cleaning filters and blower components—can prevent many issues before they start.
When in doubt about your ability to safely complete a repair, consulting with a professional is always the wisest choice.
By understanding your vent hood's components and common failure points, you can make informed decisions about repairs and potentially save hundreds of dollars in service calls for relatively simple fixes.


